PROTOYPE CAST #3 SEPIOID ALIEN MASK KIT READY TO SHIP
Regular price
$250.00
Sale price
$0.00
Unit price/per
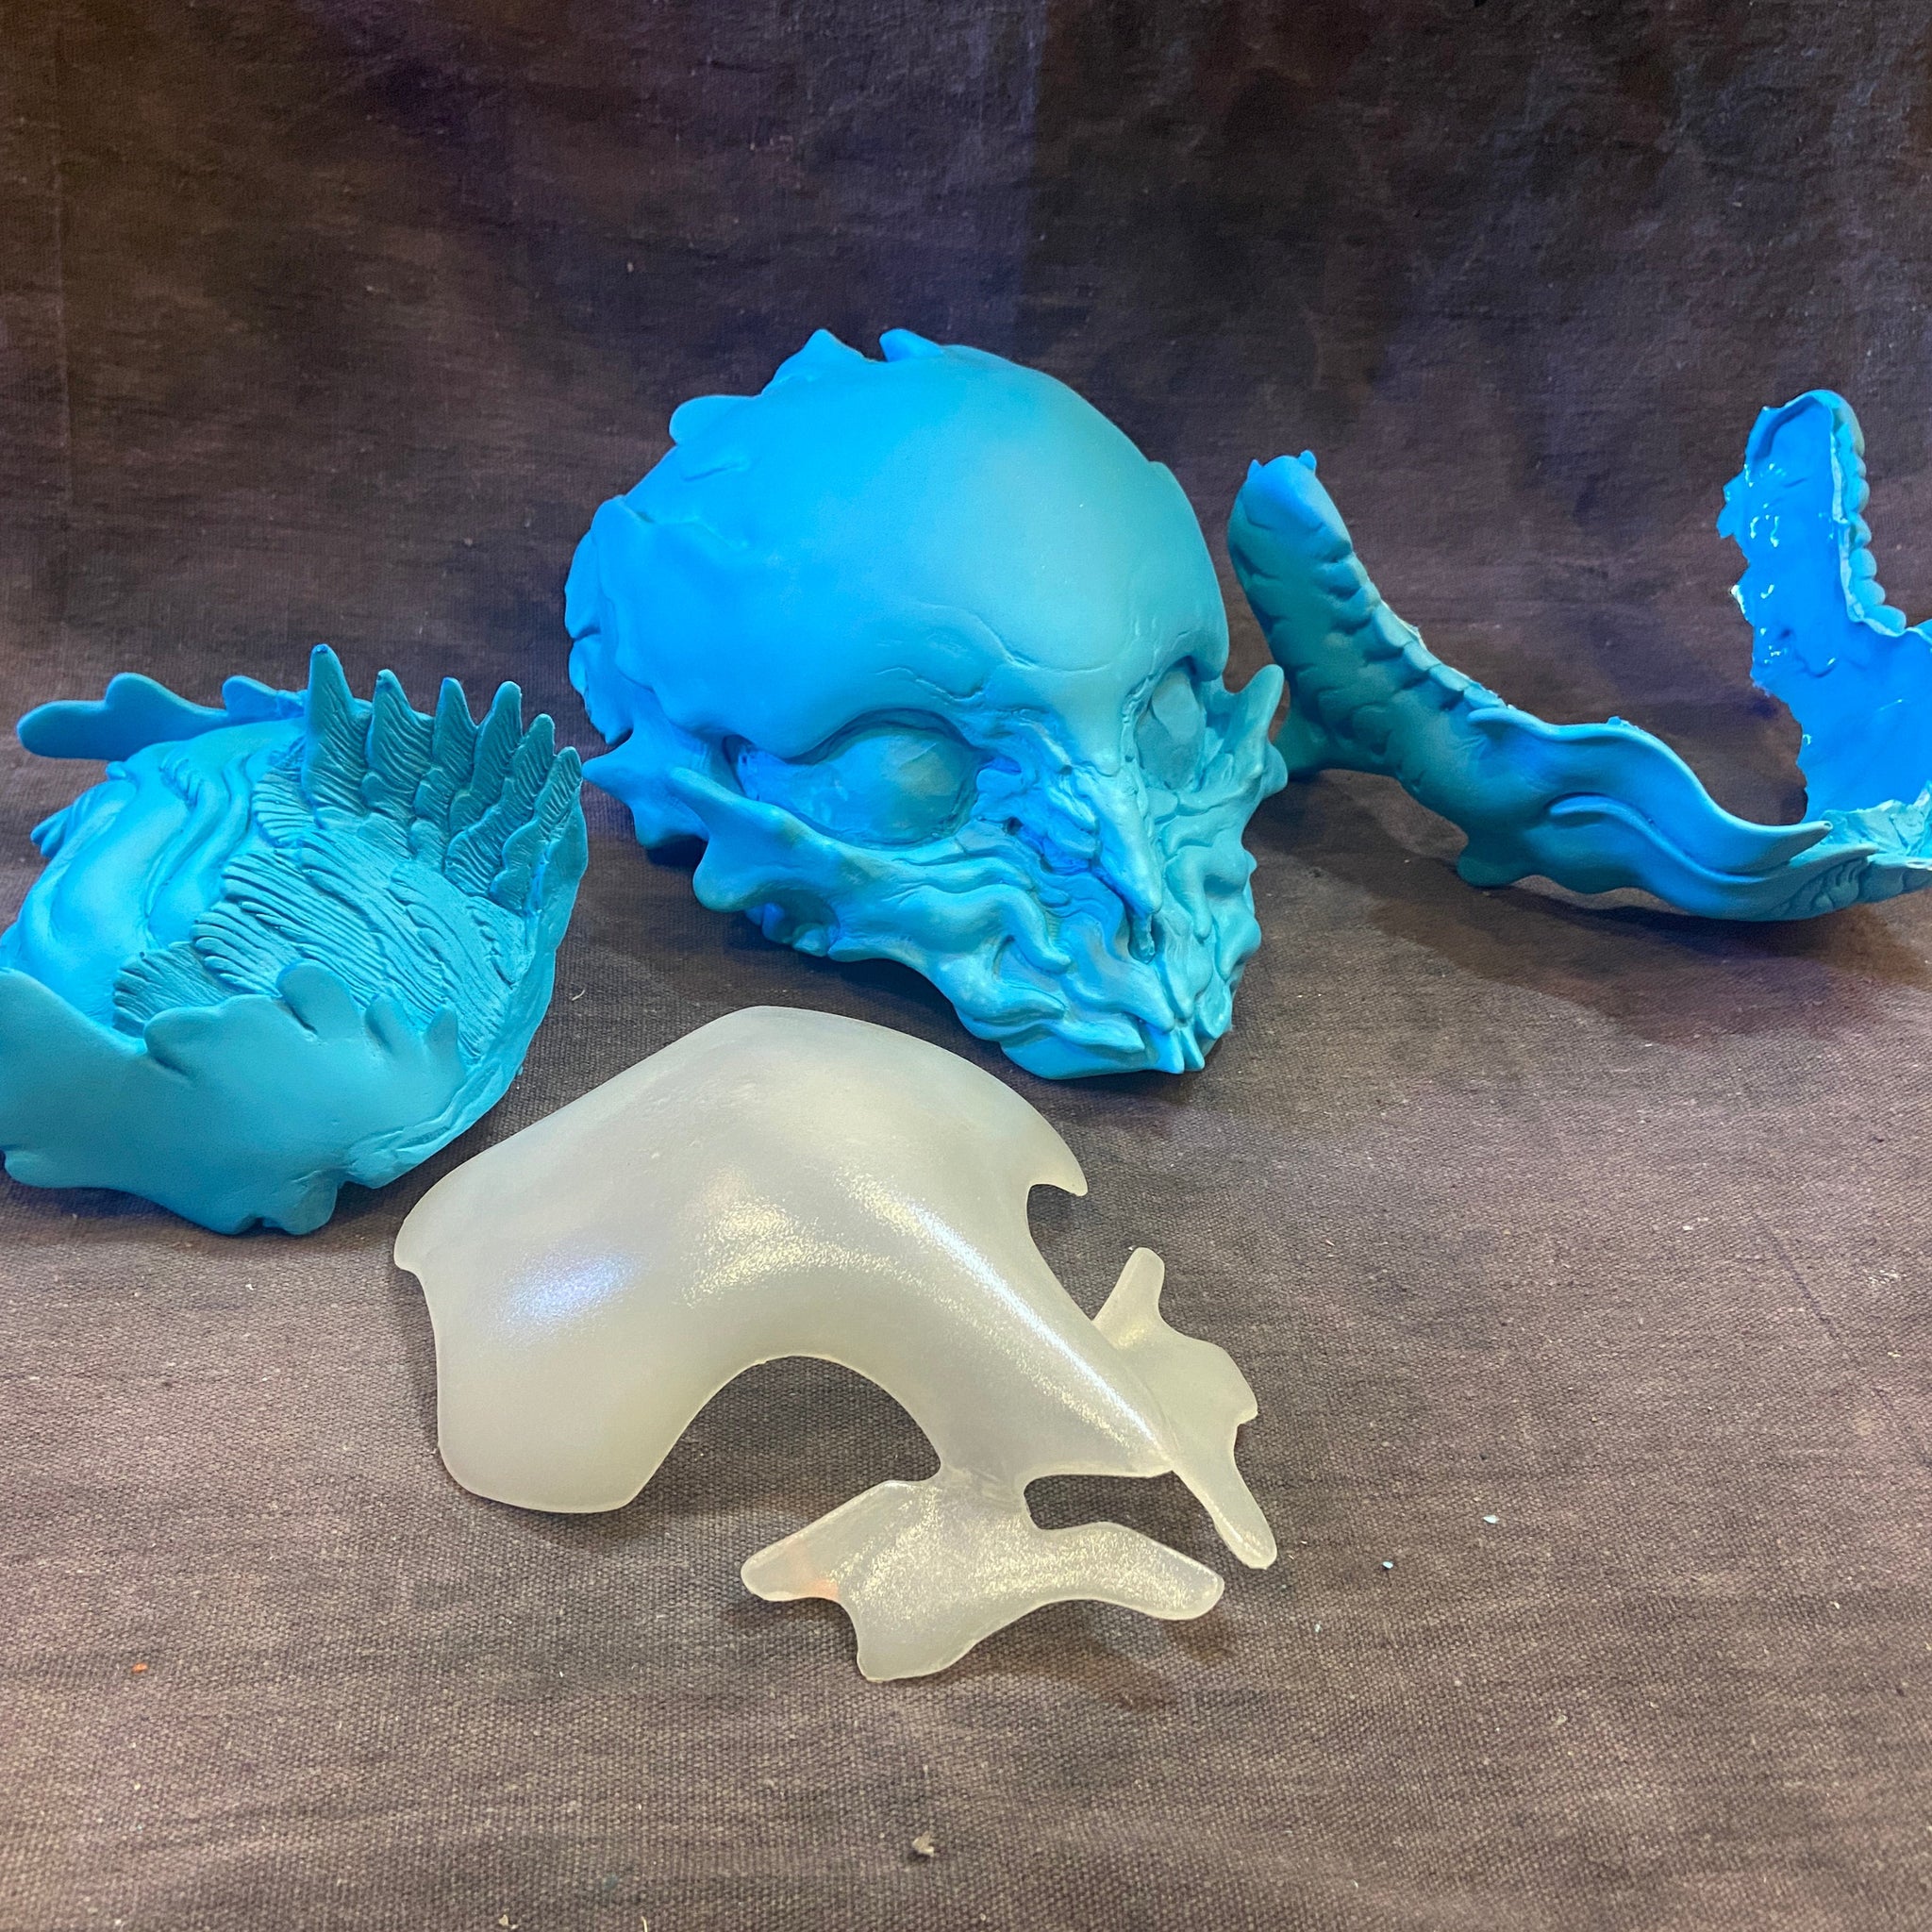
"Sepioids are peaceful, curious aliens who evolved in low gravity that somehow supports a very humid lower atmosphere. Their scent/respiratory sensory organs are located on the back of their round heads, the appendages constantly refresh moisture much like a human eye blink. Their mouth appendages are used to produce bubbling singing speech, and for gesturing and emotional signalling, in constant intricate motion. However, when visiting higher grav worlds, these tend to be held tightly together while a vocal translator is used for communication. One speculates that gravity exerts too much pull for them to speak with the same graceful articulation, much like a human trying to speak after a shot of paralysing novocane. Sepioids are able to keep their jelly- like bodies upright and ambulatory for short periods of time while visiting higher gravity environs but must retire to a tide pool float pod for several hours for sleep and recovery. Many of them can be seen with curious semi transparent carapace sitting over their forehead. This is in fact another living creature! These symbiotic amphibious animals spend most of their life in a flat jellyfish like stage until they are ready to reach the next life cycle by attaching to a Sepioid, permanently shaping themselves to the round forehead. It is unknown what the mutual benefit is for both creatures but it is speculated it provides some sort of armor or sensory enhancement for the Sepioid while the jelly-creature gets free meals and protection for the rest of their life."
***CASTING #3: This is one of the experimental casts to figure out pour weights, dye amounts and slush casting technique for this complicated piece. This was an experiment to figure out lower cost glowing opaque casts to offer for sale in the future. Casts will glow in the dark! There are voids in the tentacle lip tips on the jaw!
Here is a link to my tutorial page! You can find how to make the flappy gill hair and the eyelashes that you see on my finished mask as well as ideas for customizing the carapace. You can also learn how to hinge a jaw!
-This model was sculpted over the Monster Makers Alanna bust and is pretty snug. You may want to widen it a bit via heat shaping! I will try to make these casts thin without being fragile but I mention this because it may be a challenge for some folks to get this to fit. The back panel was cast separately so that it can be attached with flat elastic to flex over the back of the head. The elastic will hold the panel on while being able to stretch when the mask is put on and taken off. The parts can be heat shaped and I recommend doing this once the mask is trimmed and sanded WITH the jaw taped on so that it widens/shapes with the top casting. Make sure the lips/side teeth line up when shaping.
- Because of the translucent material used for the first two layers of these casts, this kit will be more flexible than my usual masks. I recommend reinforcing the inside of the pieces with putty to prevent warping once it is completed and fits well- remember to roughen the inside of the mask to get the putty to stick better! If you want to have hardcore toughness, use PC putty though it is dense and heavy, use sparingly!
- There will be differences in color/translucency distribution, no two will be the same! This is a very finicky, time consuming process but I do like that each mask will be completely unique. Please be okay with "imperfections"! There may be small air pockets under the surface, these can be cut open from the back and filled with transparent epoxy if desired ( try to find an epoxy that will not yellow once cured! Though that looks sort of cool too...)
The carapace has a bump imperfection on the surface thanks to a sneaky air bubble in the mold ( yes, i vacuumed my silicone) that shifts when cast under pressure. Very annoying! Rather than make a whole new expensive mold I just sanded the bump down flat. Done. It's fine.)
-I highly recommend heating the INSIDE of the mask when widening and heat shaping. There are tiny air bubbles under the surface that will expand and bubble when heated too intensely with a heat gun. Heating on the inside means any possible bubble pockets won't be seen on the outside surface of the mask.
-I had to do some dremeling with a sanding drum to shape the inside in some parts, especially the inside of the nose ( I have a long nose!) Slush casting creates an uneven thickness in some parts, this is normal and more prevalent with this design since I have so many undercuts and flat extended bits that I'm trying to keep air pockets out of. A sanding drum will also be needed to shape the underside of the top face piece "gills" to get the back fin panel casting to line up and conceal the seam between the two. It's a pain in the ass and I'm sorry! I tried to get this to be part of the mold but the undercut was just too problematic for trapping air and had to be vented.
-Smooth-on makes an adhesion promoter you can mix with your acrylics that helped me get my paints to stick to the slick surface of the casting without using a primer or sanding the surface. It also has the benefit of making a glaze like effect when mixed with paint which allowed me to dry brush the various translucent layers on with a soft brush. You should seal it all with a spray clear coat at the end too.
------
- I strongly recommend that the buyer have familiarity with finishing masks, models, props or some crafting knowledge or the desire to learn on their own. This is not a beginner project. I cannot provide help beyond what has been provided here. A lot of new people are finding my work thanks to this piece and I really REALLY must be clear about this. I cannot provide refunds once the order is placed.
The original was sculpted in clay, this is not a 3D print.
Any information about shipping status, production delays or anything else customers need to know will be updated in the news section. Please refer to this before inquiring about an order you placed: http://missmonster.myshopify.com/blogs/news
-Please order to your current, correct address. If you may be moving soon, please have it sent to a friend. I cannot send a mask to an address that is different from the one included in your order as it will negate seller shipping protection.
- Buyer will receive a fulfillment email once the mask is packed and another email with tracking once it ships. PLEASE check your spam filters!
-The photos of the finished mask is just to show what can be done.
The basics:
- This is for a raw cast kit that includes one (1) top head, one (1) bottom jaw, one (1) back fin panel and one (1) translucent symbiote carapace. All face pieces will be slightly translucent and cast in a semi- flexible urethane with a glow in the dark bottom layer. The carapace will be cast in a transparent urethane with color shifting pigment mixed in. Due to the layering techniques there will be variations in coloring, layer color thickness and how much each layer shows through. Please be open to your kit being unique!
All pieces will be unfinished, untrimmed , unpainted casts.
I ended up using 1/4" wide ( not length) elastic near the inner jaw hinges and another 1/4" wide that crosses over that. The length of the mask makes the elastic a bit tricky but the extra elastic seems to work well. There are many ways to do this so please be sure to check out all the tutorials that are out there!
- These will take a lot of work to finish. The buyer will need to sand/remove the flash edges, fill any small surface air bubbles , sand imperfections, cut out eye holes and assemble. I recommend familiarity with putty, epoxy clay, dremels , industrial hot glue and the safety precautions that should be taken when working with these materials.
- I strongly recommend that the buyer have familiarity with finishing masks, models, props or some crafting knowledge or the desire to learn on their own. This is not a beginner project. I cannot provide help beyond what has been provided here.
- A plastic nipper, a rasp , sandpaper or a dremel can be used to refine edges.You can even use carving tools. Here is a little more detailed info. Buyer should add upholstery foam to the inside of the mask once it is finished to customize the fit. Flat elastic straps across the back of the mask will make it stay on your head. Some craft/paint/kit building knowledge is recommended. I cannot provide build help beyond the info included here and in links provided.
- Please be sure to provide the correct address when placing your order, all orders will be shipped to the address im provided with and cannot be changed after the order is placed. I will have to cancel your order and ask you to re-order with the correct one. No exceptions, sorry!
- There are no refunds on pre-orders.
- Please do not buy a mask if any of the above is an issue!
- You will receive a BLANK urethane mask kit . The finished photos are just an example of what the mask can look like when completed.
- Once sanding/finishing is complete the mask can be primed with any spray primer and painted with acrylics or whatever you prefer. Wash your mask with dish soap first to remove any oils or dirt. Seal with clear coat to prevent scuffs after painting.
- While there is no industry standard for handmade urethane mask thickness, i try to keep a good balance of durability and a light weight. Buyer may add to any thin spots with lightweight putty or subtract any thickness with a dremel or carving tool. Everyone has a personal preference for how thick/thin they want their mask and there is no way to predict this preference between individuals.
- Elastic bands can be used for straps across the back of the head. Please be sure to roughen or "score" the inside part of the mask where the straps will attach. This will help the adhesive stick properly.
- This urethane is sensitive to heat. Please keep it out of direct sunlight as it can warp under it's own weight when hot. If the mask does not fit, It can be heat shaped by using a hairdryer or heat gun to warm the surface and inside. Gently open the mask by holding and spreading both sides while warm to make it wider. Set the shape you want by immersing the warm mask in cold water or leaving on an upturned bowl or object to hold the shape while it cools.
- This is a project that should be attempted by adults or under adult supervision. Please read all safety warnings on materials you use. I am not responsible for any injuries sustained while customizing these masks.
-This mask fits most faces but a perfect fit is not guaranteed. Cannot be worn with glasses.
- Do not use this as safety equipment or a welding mask or anything else but costuming. Use common sense, please. I am not responsible for injuries sustained through improper use of this mask.
By purchasing this you acknowledge that you have read and agree with the shop's policy page and have read and agree to comply with all of the information on this page.
I have a TON of tutorials and process/creation information on my patreon!
choosing a selection results in a full page refresh