MAKE ALIEN FLAPPY PARTS, EYELIDS AND CUSTOMIZE CARAPACE
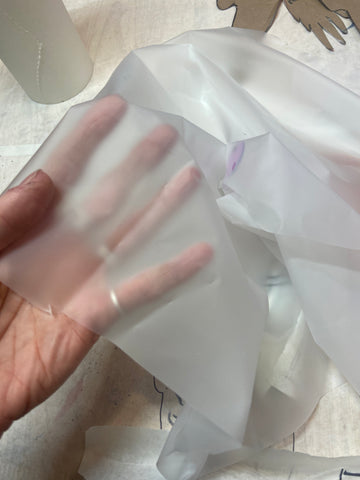
I used a .02mm TPU fabric for the grey shapes and used a thicker version to make the colored middle parts. The thicker version is also known as "jelly vinyl" , often used to make hairbows while the thin version is sometimes used for raincoats. I chose it because it can be hot glued ( I recommend the high strength version as it has a better hold and really mash it in when gluing ) and is pretty tough! I also found that it can be drawn onto with alcohol markers- if you mess up, just wipe the surface with isopropyl and start over. It can also be dyed with Rit synthetics!
The thin version has a great movement and bounce to it once you cut the little feathery lines into the edges. Don't but the .01mm because it will curl up when you cut in the feather textures!
Before you start, if the thin fabric is wrinkled you can smooth it out before cutting by applying heat- be careful! Too much and it will curl up and be ruined.
This is the original white color. I dyed mine using RIT synthetic purple, sunshine orange, teal and coral.
So I made a pattern with paper and traced it onto my table tape with the inner marking also drawn in for consistency and speed:
Remember to have a mirrored version too
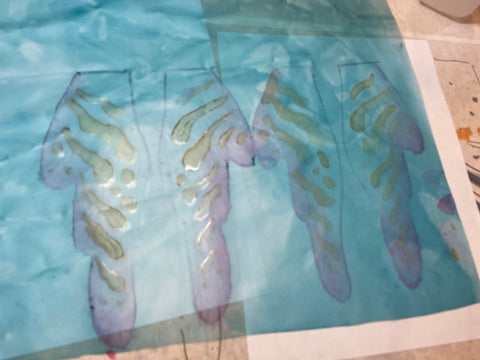
I did a first wash with isopropyl 99% + red acrylic ink:
I used a copic marker to fill in the markings but ended up using isopropyl + raw sienna acrylic ink because i didnt like the streakiness seen in larger filled in spots. I mostly used copics for fine outlines and feathering the edges of the shapes with lines:
I did like how the copic could be used to make a defining line around the markings:
I used purples, pinks , tans and grey for the copics! You can also use plain isopropyl on a q-tip to remove ink and make "clear " parts.
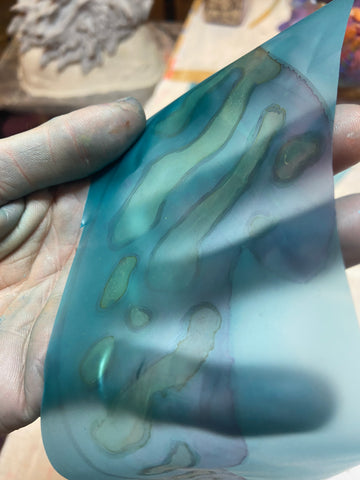
I flipped the material around to be the front because the copics and alcohol can make a sheen that doesnt match the matte of the material- the other side hides this!
I also didn't cut the shapes until all of the markings had been painted on. It is easier to control the material this way. Once you are happy with the piece, cut it out!
( You will want to cut it a little finer than this, the grey versions are the prototypes i made )
I made this little shape with the thicker stuff, this is sandwiched in between two thin layers. Is is less translucent than the thin material so it adds a cool effect when seen in between, sort of a hidden mysterious appendage peeking through...
And it is translucent enough where you can play with adding marks on the other side...
It will still show through!
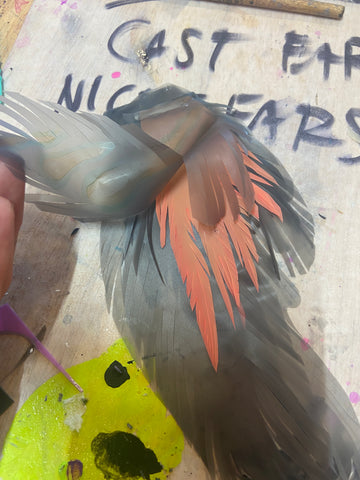
After MANY hours of dying, painting, gluing and cutting, I have some flappies! Here they are being laid out, layered, for gluing. You can see how I added patterns and colors using different ink or copic marker colors. Placing them over a white backing will help you see the colors better while working on things...
A little detail!
These are my pattern shapes! Please feel free to make your flappies any shape you want but also feel free to use these!
Here are the patterns in the layered position. The middle spikey shape is cut out of the thicker colored TPU ( which can also be drawn on with marker)
You can see hpw the marker lines on the back creates a nice subtle natural layer marking when seen with the orange middle bit under it.
EYELIDS!
Pretty much the same deal as the flappies, but I used the thicker version:
I knocked down the shine with some clear matte coating though the Semple one linked is more eggshell than truly matte but it works with the mask finish.
I added another marker layer after the clear matte coat so it is a a little shiny here but there you go!
I punched in little holes to help it glue more securely but it's probably not that important.
Install 'em! I hot glued the edges in while positioning the lids where I wanted and making sure they are (somewhat) symmetrical. I use Kryolan aquacolor with a good sealer to paint my face dark purple or black to blend in a bit but there will still be the effect of the face being on top of your face which, in my opinion, works with this design since it sells the idea of this layered look even more. You could do a black speaker cloth with gold eyes but I prefer making eye contact and having more humanity showing with this one.
CARAPACE:
You can play with the translucent property of the carapace by painting stuff on the back! I marked some eyespots with a marker on the front ( the lines can be wiped off with isopropyl):
I painted in black lines and then did a gold leaf fill to get a nice light reflection through the surface when seen through the front:
Added white lining around the eyes. After this I airbrushed a transparent white onto the back at the top that fades to the clear at the bottom:
This is what it looks like from the front ( before the white airbrushing)
I then used Triple Thick brush on into the back and laid in alpaca hair with tweezers to look like veins. Use a brush to push the hair into the glossy triple thick before it dries, use tweezers to move the hair around to look more natural. I also used iridescent fibers on the inside.
Here it is from the front!
I finished it all with a glossy clear spray on the front to make it all extra transparent!
I ended up gluing the carapace on permanently since I didnt want to fuss with hiding magnets.