I laser cut this stiffened felt but this can be done by hand with scissors. It may be easier to paint by drawing the design first but not cutting until painting is finished to prevent curling. Tape it down to hold in place!
You can pre-wet the felt to get the paint to flow evenly and not just sit on the surface. I used water mixed with black acrylic ink to make different shades of grey/black wash and applied to the felt using a brush. You can also use acrylic ink and isopropyl alcohol, sometimes it soaks in better!
You can splatter on some of the wash for a texture or drag a stiff brush to make marks. Once it is dry you can also use alcohol markers or permanent markers to draw feather lines, stripes, dots, etc!
You can use different colors on the layers and make a cool effect! Make sure everything is very dry before hot gluing!
...or do a more plain, basic cartoony look:
Here are the three shapes I used:
I hot glued some wire on the back of the second layer:
Then glued the second layer onto the first layer:
Then glued the third layer on top:
On the back i glued the third layer on the first layer:
With the wire inside you can drill a hole into the top of the Moffmang head and threading the wire through the hole and gluing the inside- now the ear can be posed or bent down if you need to travel with the ears flat! I plan to use a little black faux fur to hide the crime of the very obvious glued down bottom ear and blend it into the black head with the fur.
------
Eyes can be layered with laser cut acrylic circles ( the red and pink donuts shown) However, most people don't have a laser cutter just laying around so you could also use colored paper, fabric or many other materials to make a similar stacked effect! Experiment with translucent foils or iridescent cardboard or whatever!
You can also just use the see through lens over the see through red metallic visor or any other see through effect lens or plastic you want! You do not have to do the stacked outer layers to make a cool eye.
This shows how the layers are stacked, the clear bubble lens glues into the BACK of the Moffman eye socket with the first RED donut glued to the back of the lens, the second PINK donut glued on the back of the RED donut and a plain cut out circle of the SEE THROUGH VISOR SHEET glued to the back of the PINK DONUT.
Here is how to glue the plain bubble lens plus visor sheet with no stacked layers:
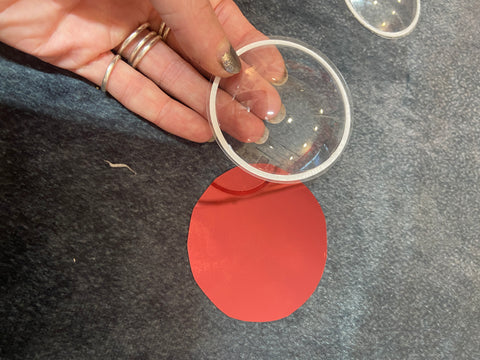
Trace the circle on the back of the visor lens sheet:
Cut it out a little bigger than the drawn circle:
Here is the front of the visor lens ( red):
Insert the clear bubble lens into the back of the eye opening. Try to glue it so the white line does not show through- also make sure your glue doesnt spread into the lens where you can see it!
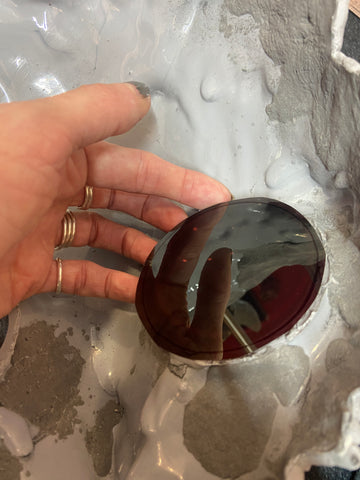
Glue your visor circle with the red facing out:
Here is the back of the mask with the bubble lens laid into the eye opening:
and now the visor lens circle that you cut out laid on the back of that bubble lens:
I also added a light up noodle from AdaFruit ( flexible LED filament) in between the "sandwich" of the acrylic donuts. But if you dont want to fuss with soldering, you could use EL Wire too! Or if you have a fancy laser, you could etch a pattern into clear acrylic lens and light that with an LED pointed at it ( just please dont point directly at your eyes!)